
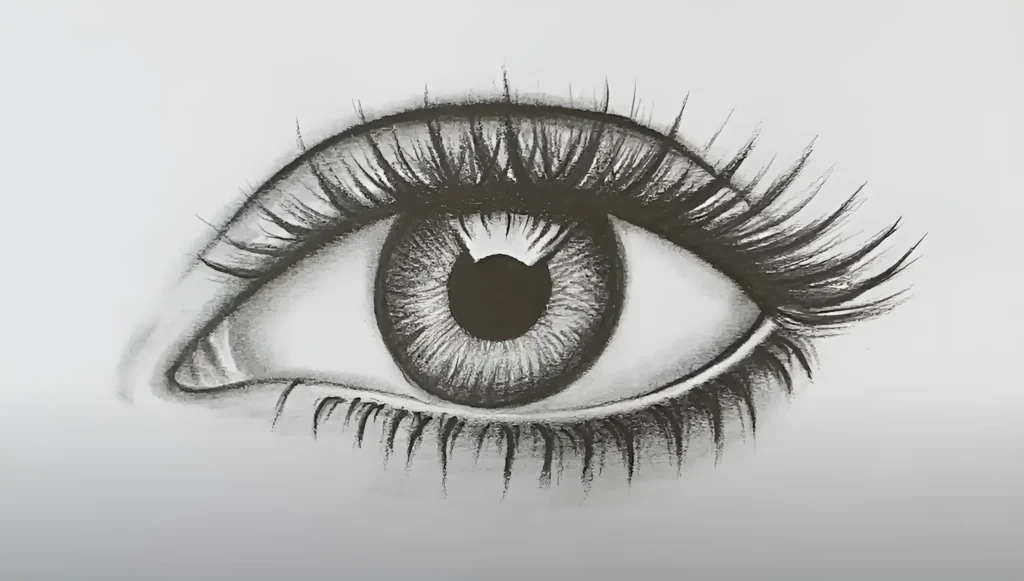
Drawing a realistic eye is one of the most rewarding skills in art, whether you’re a beginner or looking to refine your technique. Eyes are often the focal point of portraits, conveying emotion and life. In this comprehensive guide, we’ll walk you through each step to master drawing an eye, from basic shapes to the intricate details of shading. By the end of this tutorial, you’ll have a solid understanding of how to create lifelike eyes that captivate the viewer.
1. Understanding the Structure of the Eye
Before we dive into the drawing process, it’s crucial to understand the anatomy of the eye. The eye consists of several key parts: the iris, pupil, sclera (the white part), eyelids, eyelashes, and tear ducts. Familiarizing yourself with these components will help you create a more accurate and realistic representation.
2. Materials You’ll Need
To get started, you’ll need the following materials:
- Pencils: A range of pencils from 2H to 6B for sketching and shading.
- Eraser: A kneaded eraser for gentle corrections.
- Blending Tool: A blending stump or cotton swab for smooth shading.
- Paper: High-quality drawing paper with a smooth surface.
- Ruler: Optional, for measuring proportions.
3. Step 1: Drawing the Basic Eye Shape
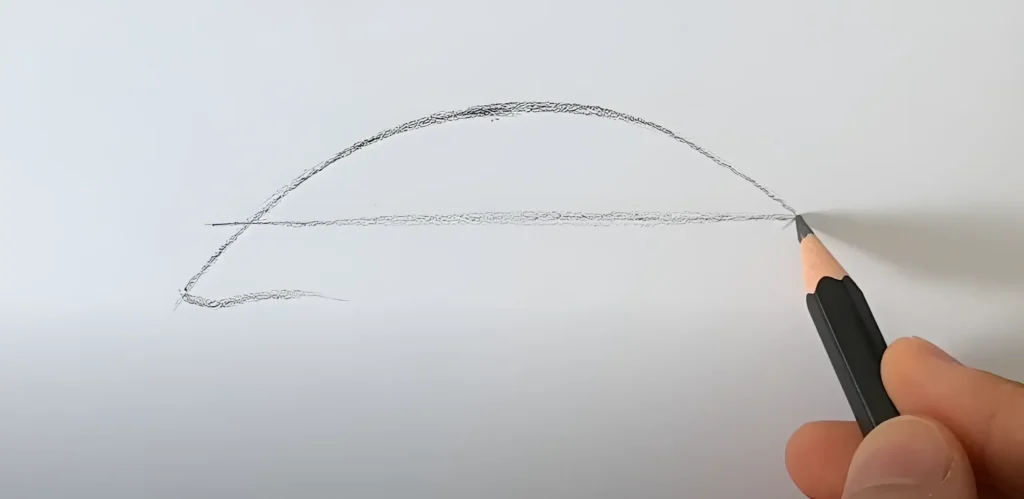
Start by lightly sketching the almond shape of the eye. This shape represents the overall outline of the eye and varies depending on the person you’re drawing. Ensure the top part is slightly more curved than the bottom.
4. Step 2: Creating the Iris and Pupil
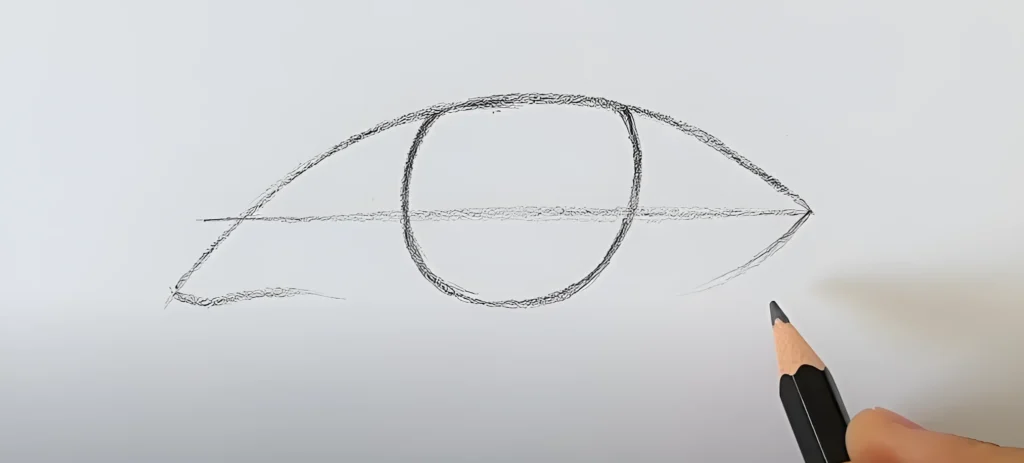
In the center of the eye, draw a circle for the iris. Within the iris, sketch a smaller circle for the pupil. The pupil is usually located in the middle but may shift depending on the direction the person is looking. To make the eye look more realistic, the top part of the iris should be partially covered by the eyelid.
5. Step 3: Adding the Eyelids
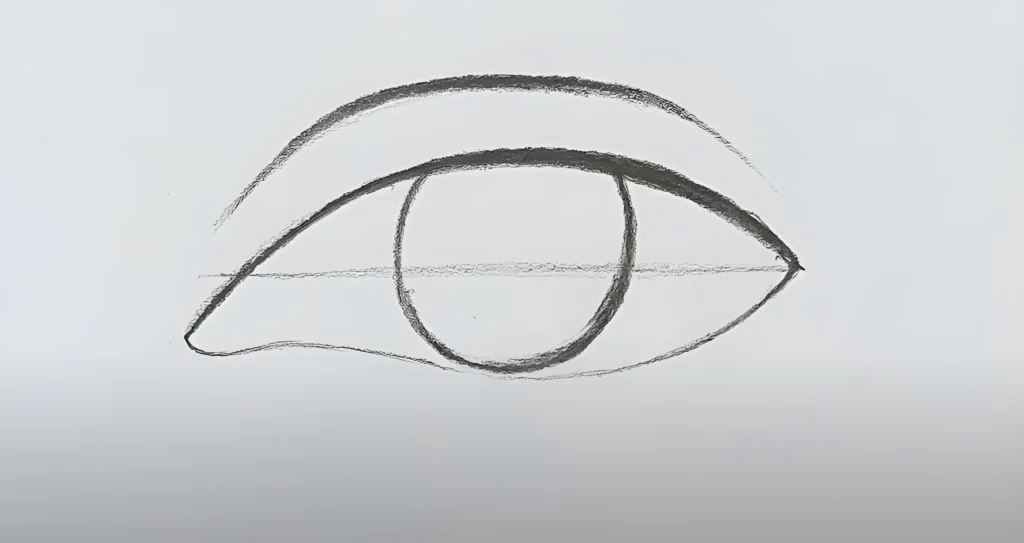
Next, draw the upper and lower eyelids. The upper eyelid should follow the curve of the eye and overlap the top of the iris. The lower eyelid is less pronounced but still important for creating a natural look. Add subtle lines to show where the eyelids meet the eyeball.
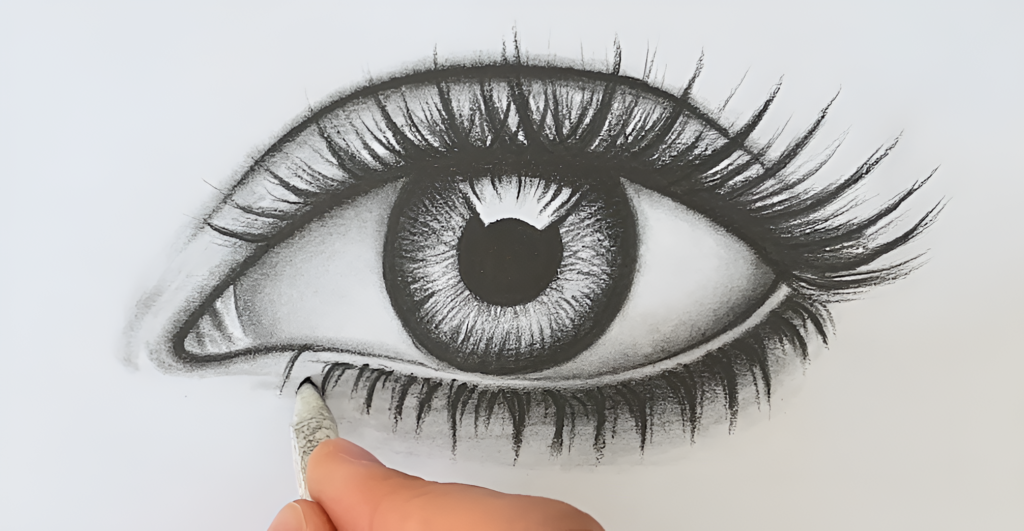
6. Step 4: Defining the Eyelashes
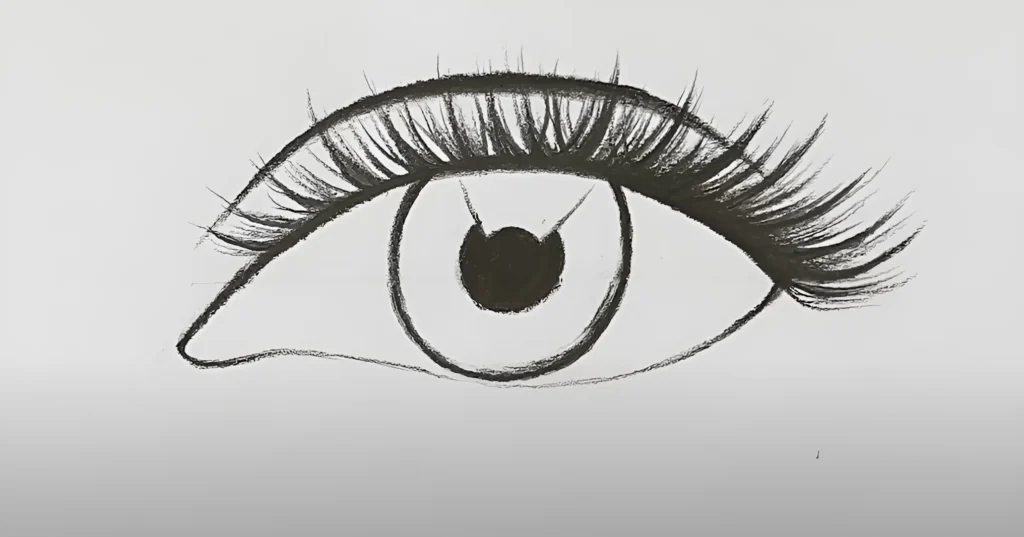
Eyelashes add character and realism to your drawing. Start by drawing individual lashes that curve outwards from the eyelids. The upper lashes are usually longer and more numerous than the lower ones. Make sure to vary the length and direction to create a more organic feel.
7. Step 5: Shading the Eye for Realism
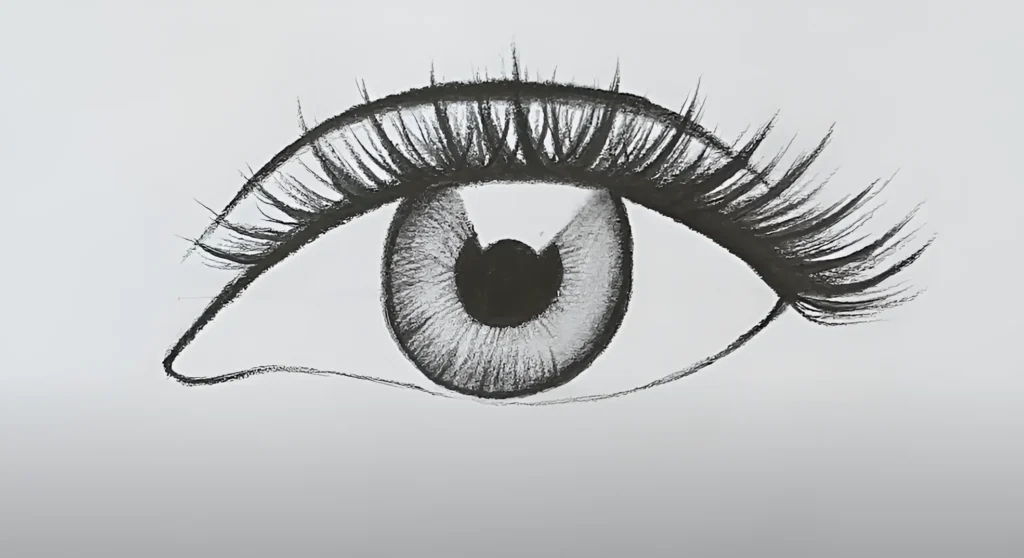
Shading is crucial for bringing your eye drawing to life. Start by adding light shading to the sclera (white part of the eye) to give it depth. Use a darker pencil to shade the iris, leaving a highlight to represent the reflection of light. Gradually build up the tones around the pupil, making it the darkest part of the iris.
8. Step 6: Drawing the Tear Duct
The tear duct, located at the inner corner of the eye, adds a finishing touch to the eye’s structure. It is typically small and can be shaded lightly to give it a subtle, natural look.
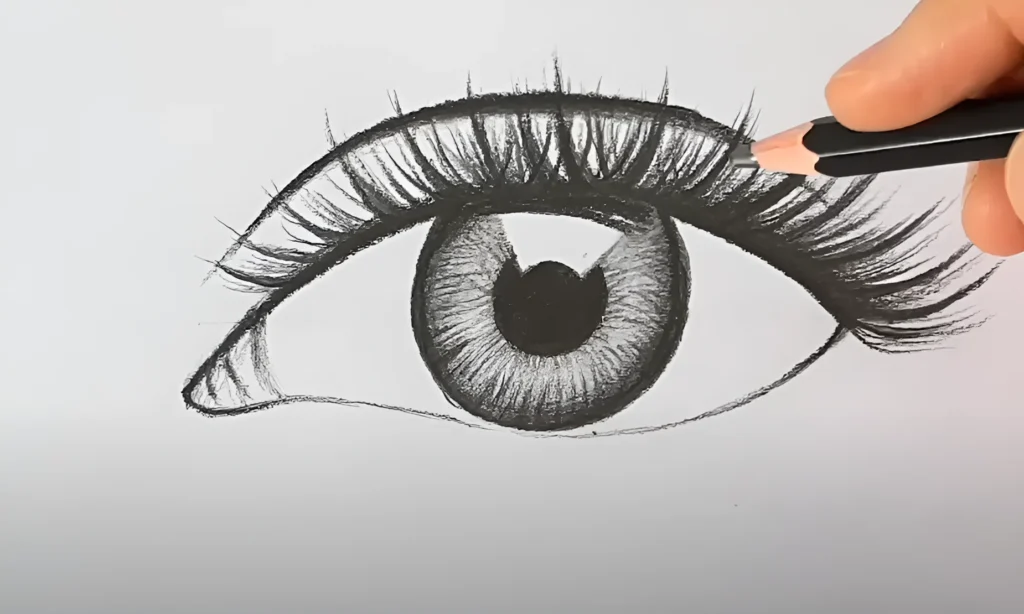
9. Step 7: Adding Depth to the Eyeball
To give the eyeball a three-dimensional effect, you’ll need to shade the area around the eye socket. Use a blending stump to smooth out the transitions between light and dark areas, paying attention to the shadows cast by the upper eyelid.
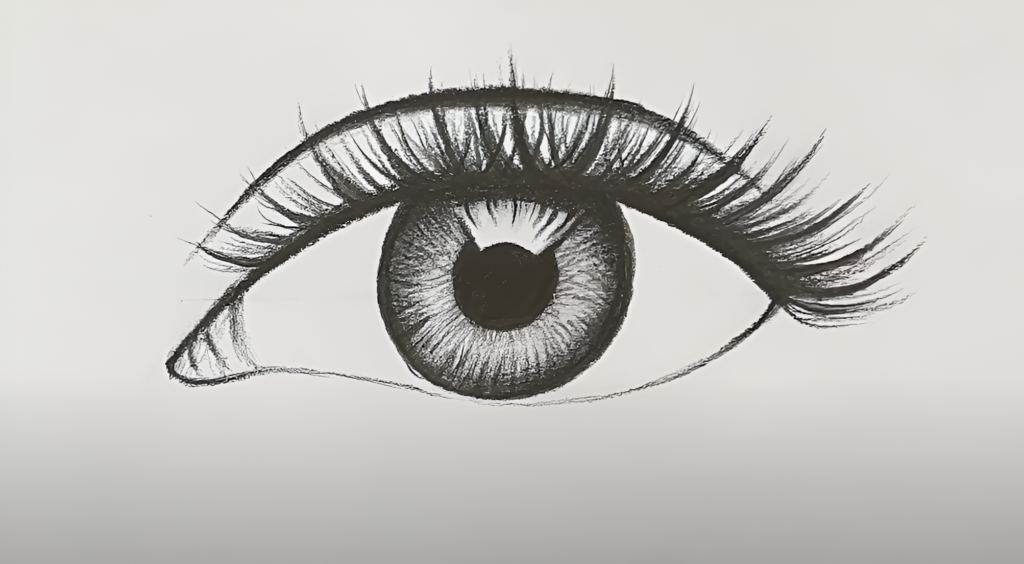
10. Step 8: Highlighting the Eye
For a realistic shine, add highlights to the eye. These are small white areas that reflect light and can be created by leaving parts of the paper unshaded or using an eraser to lift out highlights after shading. Place them in the iris and pupil for a lifelike sparkle.
12. Common Mistakes to Avoid
- Overdrawing Eyelashes: Too many or too perfect lashes can make the drawing look artificial. Keep them natural by varying their thickness and length.
- Ignoring Proportions: The size of the iris in relation to the rest of the eye is crucial. Avoid making the pupil too small or too large.
- Flat Shading: Lack of gradient in shading can make the eye look flat. Focus on smooth transitions between light and dark areas.
13. Tips for Drawing Realistic Eyes
- Study References: Look at photographs or observe real eyes to understand how light interacts with the eye.
- Practice Shading: Spend time practicing smooth shading techniques to create depth and dimension.
- Use a Variety of Pencils: Experiment with different pencil grades to achieve various tones in your drawing.
14. How to Improve Your Eye Drawing Skills
Improvement comes with practice. Here are some exercises to help you:
- Quick Sketches: Draw multiple eyes in different angles and expressions.
- Detail Focus: Concentrate on one part of the eye, such as the iris, and perfect your technique.
- Feedback: Share your drawings with others to get constructive criticism.
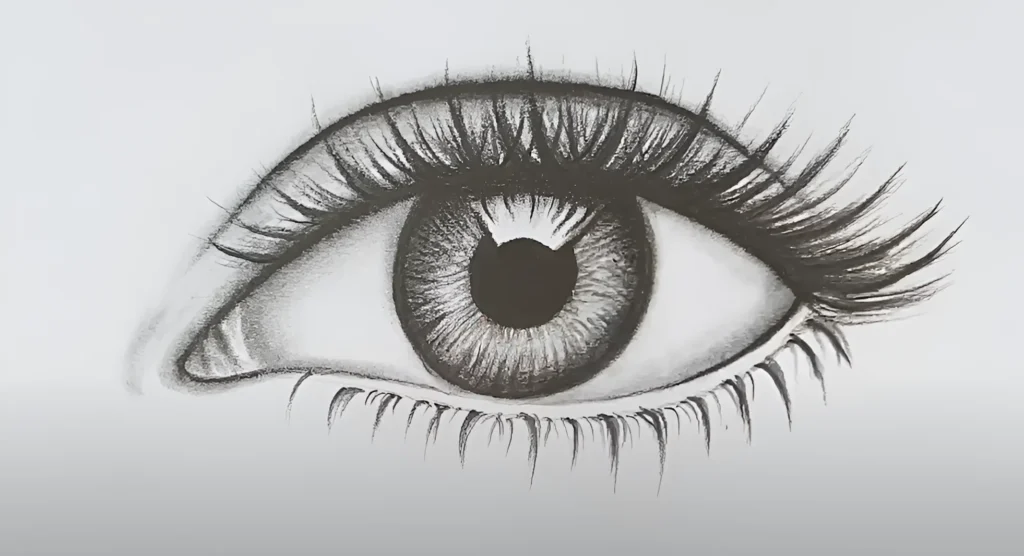
15. Final Touches
As you finish your eye drawing, step back and review your work. Make any necessary adjustments to shading or proportions, and ensure the highlights are in place. With practice and patience, you’ll master the art of drawing realistic eyes. Now that you’ve learned how to draw an eye step-by-step, try incorporating this skill into full portraits to bring your drawings to life.
Conclusion
Mastering the art of drawing eyes is an essential step in portrait drawing. With the techniques outlined above, you’re well on your way to creating realistic and expressive eyes. Keep practicing, and don’t be afraid to experiment with different styles and techniques.
Ready to put your skills to the test? Try drawing eyes in different positions and lighting conditions. Share your progress with fellow artists, and explore our beginner’s guide to flower drawing. Keep practicing, and soon, you’ll be drawing lifelike eyes with ease!