Drawing

Pipe Cleaner Lolly Pops A Fun and Easy Craft Project

Pipe Cleaner Lolly Pops: A Fun and Easy Craft Project

Pipe cleaner lolly pops are a simple yet charming craft idea that can brighten up any space. With just a few inexpensive materials and a bit of imagination, you can create colorful spiral designs that mimic the look of real candy. Whether you’re crafting with kids or exploring your creative side, this project is perfect for all ages and skill levels. What Are Pipe Cleaner Lolly Pops? Pipe cleaner lolly pops are handmade decorative items made by twisting colorful pipe cleaners into spiral shapes and attaching a stick to mimic a lolly pop’s appearance. These crafts are lightweight, versatile, and ideal for a variety of uses. Materials Needed Benefits of Making Pipe Cleaner Crafts Step-by-Step Guide to Making Pipe Cleaner Lolly Pops Step 1: Choose Your Colors Select two different colored pipe cleaners. Bright, contrasting colors work best to create an eye-catching striped pattern. Step 2: Twist the Pipe Cleaners Step 3: Create the Spiral Step 4: Add the Stick Pro Tips for Perfect Lolly Pops Safety Tips for Crafting Common Mistakes and How to Avoid Them Conclusion Making pipe cleaner lolly pops is an enjoyable and creative activity suitable for all ages. With just a few materials and some imagination, you can craft beautiful decorations or gifts in no time. Whether you’re hosting a party, decorating a space, or simply enjoying some crafting time, these pipe cleaner lolly pops are a wonderful project to try. We’d love to see your pipe cleaner lolly pops! Share your creations on social media using the hashtag #PipeCleanerCrafts and tag us for a chance to be featured. Image Source: Doodle and Stitch

Pipe Cleaner Lolly Pops: A Fun and Easy Craft Project Read More »

How to Draw a Cat A Step-by-Step Guide for Beginners

How to Draw a Cat: A Step-by-Step Guide for Beginners

Drawing is a wonderful way to express creativity, and learning to draw a cat can be both fun and rewarding. Whether you’re an aspiring artist or just someone looking for a creative outlet, this guide will walk you through the steps of sketching a cat from start to finish. In this tutorial, we’ll focus on simple techniques to help you master the process while adding your own unique flair. Introduction Drawing a cat may seem daunting at first, but with the right steps, anyone can do it! This guide breaks the process into easy, manageable parts, ensuring you can follow along no matter your skill level. By the end of this tutorial, you’ll have a sketch of a cute cat and the confidence to try drawing other animals. Tools You’ll Need Before we begin, gather the following tools: Understanding the Cat’s Anatomy Before sketching, it’s essential to understand the basic anatomy of a cat. Cats have a rounded head, triangular ears, large expressive eyes, and a sleek, flexible body. Observing reference images can help you grasp their proportions and unique features. Step 1: Drawing the Basic Outline Start by sketching two curved lines to form the foundational shape of the cat’s head. Think of these as a loose oval or slightly rounded rectangle. These basic shapes help set the stage for the details later. Step 2: Adding the Ears On top of the head, draw two triangular shapes to represent the ears. Ensure they’re symmetrical and slightly curved to give a natural look. Keep your lines light and adjustable at this stage. Step 3: Drawing the Front Paws Extend two curved lines downward from the head to form the arms. At the end of each arm, sketch small ovals or rounded rectangles for the paws. Add a few short lines on the paws to create the illusion of toes. Step 4: Shaping the Body Below the head, draw an oval or rounded rectangle to form the body. The body should be slightly larger than the head, extending downward to create a balanced shape. Step 5: Adding Fur Details to the Face To add personality to your cat, sketch short, gentle lines around the face to mimic fur. Start from the center of the face and fan the lines outward. Vary the length and direction of the lines for a natural effect. Step 6: Sketching the Eyes Step 7: Drawing the Nose and Mouth Step 8: Creating the Tail Position the tail at the lower right side of the body. Draw a long, curved line extending outward and slightly upward. Add a few horizontal lines near the tip of the tail to create stripes. Step 9: Adding Stripes and Final Details To give your cat a distinctive look, add vertical stripes on the forehead and horizontal stripes across the body. Make sure the stripes follow the natural contours of the cat’s shape for a realistic effect. Conclusion Drawing a cat is easier than you think when you follow a step-by-step approach. Practice makes perfect, so don’t be discouraged if your first attempt isn’t flawless. Keep experimenting, and soon you’ll be drawing cats effortlessly.

How to Draw a Cat: A Step-by-Step Guide for Beginners Read More »

Cool Crafts with Pipe Cleaners: Five Fun Projects to Try

Pipe cleaners are more than just cleaning tools; they are a gateway to creativity and fun! These flexible, colorful sticks can be transformed into a variety of exciting crafts. Whether you’re looking for activities to do with kids or simply want to unleash your artistic side, this article showcases five cool crafts with pipe cleaners that are easy to make and enjoyable for all ages. Get ready to twist, bend, and shape your way into a world of crafting! What Are Pipe Cleaners? Pipe cleaners are flexible sticks made from twisted wire and nylon fibers. Available in various colors and sizes, they are often used in crafting due to their versatility and ease of use. Originally designed for cleaning pipes, they have found a beloved place in the world of arts and crafts. Why Use Pipe Cleaners for Crafts? Crafting with pipe cleaners is beneficial for several reasons: Essential Supplies for Pipe Cleaner Crafts Before you start crafting, gather these essential supplies: Five Cool Pipe Cleaner Crafts 4.1 Pipe Cleaner Caterpillar Instructions: Tip: Personalize your caterpillar by using different colors for each segment! 4.2 Fuzzy Pipe Cleaner Dog Instructions: Tip: Experiment with different colors to create various dog breeds! 4.3 Colorful Pipe Cleaner Flowers Instructions: Tip: Mix and match colors for a vibrant bouquet! 4.4 Pipe Cleaner Bookmark Instructions: Tip: Customize bookmarks with your favorite colors or themes! 4.5 Pipe Cleaner Christmas Ornaments Instructions: Tip: Create a variety of ornaments to make a unique holiday tree! Conclusion Crafting with pipe cleaners is a delightful way to unleash your creativity and make memorable projects. Whether you’re creating a caterpillar, a fuzzy dog, colorful flowers, bookmarks, or festive ornaments, there’s endless fun to be had! Ready to start your crafting adventure? Shop now for high-quality pipe cleaners and get inspired to create your own masterpieces. Share your creations with friends and family, and happy crafting!

Cool Crafts with Pipe Cleaners: Five Fun Projects to Try Read More »

How to Draw an Eye: A Step-by-Step Guide for Beginners

Drawing a realistic eye is one of the most rewarding skills in art, whether you’re a beginner or looking to refine your technique. Eyes are often the focal point of portraits, conveying emotion and life. In this comprehensive guide, we’ll walk you through each step to master drawing an eye, from basic shapes to the intricate details of shading. By the end of this tutorial, you’ll have a solid understanding of how to create lifelike eyes that captivate the viewer. 1. Understanding the Structure of the Eye Before we dive into the drawing process, it’s crucial to understand the anatomy of the eye. The eye consists of several key parts: the iris, pupil, sclera (the white part), eyelids, eyelashes, and tear ducts. Familiarizing yourself with these components will help you create a more accurate and realistic representation. 2. Materials You’ll Need To get started, you’ll need the following materials: 3. Step 1: Drawing the Basic Eye Shape Start by lightly sketching the almond shape of the eye. This shape represents the overall outline of the eye and varies depending on the person you’re drawing. Ensure the top part is slightly more curved than the bottom. 4. Step 2: Creating the Iris and Pupil In the center of the eye, draw a circle for the iris. Within the iris, sketch a smaller circle for the pupil. The pupil is usually located in the middle but may shift depending on the direction the person is looking. To make the eye look more realistic, the top part of the iris should be partially covered by the eyelid. 5. Step 3: Adding the Eyelids Next, draw the upper and lower eyelids. The upper eyelid should follow the curve of the eye and overlap the top of the iris. The lower eyelid is less pronounced but still important for creating a natural look. Add subtle lines to show where the eyelids meet the eyeball. 6. Step 4: Defining the Eyelashes Eyelashes add character and realism to your drawing. Start by drawing individual lashes that curve outwards from the eyelids. The upper lashes are usually longer and more numerous than the lower ones. Make sure to vary the length and direction to create a more organic feel. 7. Step 5: Shading the Eye for Realism Shading is crucial for bringing your eye drawing to life. Start by adding light shading to the sclera (white part of the eye) to give it depth. Use a darker pencil to shade the iris, leaving a highlight to represent the reflection of light. Gradually build up the tones around the pupil, making it the darkest part of the iris. 8. Step 6: Drawing the Tear Duct The tear duct, located at the inner corner of the eye, adds a finishing touch to the eye’s structure. It is typically small and can be shaded lightly to give it a subtle, natural look. 9. Step 7: Adding Depth to the Eyeball To give the eyeball a three-dimensional effect, you’ll need to shade the area around the eye socket. Use a blending stump to smooth out the transitions between light and dark areas, paying attention to the shadows cast by the upper eyelid. 10. Step 8: Highlighting the Eye For a realistic shine, add highlights to the eye. These are small white areas that reflect light and can be created by leaving parts of the paper unshaded or using an eraser to lift out highlights after shading. Place them in the iris and pupil for a lifelike sparkle. 12. Common Mistakes to Avoid 13. Tips for Drawing Realistic Eyes 14. How to Improve Your Eye Drawing Skills Improvement comes with practice. Here are some exercises to help you: 15. Final Touches As you finish your eye drawing, step back and review your work. Make any necessary adjustments to shading or proportions, and ensure the highlights are in place. With practice and patience, you’ll master the art of drawing realistic eyes. Now that you’ve learned how to draw an eye step-by-step, try incorporating this skill into full portraits to bring your drawings to life. Conclusion Mastering the art of drawing eyes is an essential step in portrait drawing. With the techniques outlined above, you’re well on your way to creating realistic and expressive eyes. Keep practicing, and don’t be afraid to experiment with different styles and techniques. Ready to put your skills to the test? Try drawing eyes in different positions and lighting conditions. Share your progress with fellow artists, and explore our beginner’s guide to flower drawing. Keep practicing, and soon, you’ll be drawing lifelike eyes with ease!

How to Draw an Eye: A Step-by-Step Guide for Beginners Read More »

How to Draw a Flower: A Step-by-Step Guide for Beginners

Drawing flowers is one of the most rewarding ways to tap into your artistic side. Whether you’re new to drawing or want to refine your skills, learning how to draw flowers offers a perfect starting point. In this guide, we’ll walk you through the essentials of flower drawing, covering tools, techniques, and tips to help you create beautiful floral art. By the end, you’ll have the confidence to draw flowers with ease. Why Drawing Flowers is a Great Starting Point Flowers have a simple yet elegant structure, making them an ideal subject for beginners. The symmetry, flowing lines, and variety of shapes allow you to practice essential drawing techniques like shading, detailing, and proportion. Additionally, flowers are easy to find and observe, providing endless inspiration for your art. Tools You Need to Draw a Flower Before starting, ensure you have the right tools: Understanding Basic Flower Anatomy To draw a flower accurately, you should understand its basic parts: Step 1: Sketch the Flower Shape Begin by lightly sketching the overall shape of the flower. For most flowers, this will be a circular shape for the petals and a straight or curved line for the stem. Don’t worry about perfection at this stage; the goal is to map out the basic proportions. Step 2: Drawing the Petals Next, focus on drawing the petals. Start from the center and work outward. Most flowers have multiple layers of petals, so begin with the innermost layer before moving to the outer petals. Pay attention to the overlapping lines as petals fold over each other. Step 3: Adding the Stem and Leaves Once the petals are drawn, move on to the stem. Draw a straight or slightly curved line extending downward from the base of the flower. Add leaves along the stem by sketching elongated, oval shapes. Step 4: Creating Depth with Shading Shading is where your flower drawing comes to life. Focus on the areas where the petals overlap to create shadows. Use a blending stump or your finger to soften the shading for a more realistic look. Step 5: Enhancing Details Now, refine your drawing by adding finer details. Look for small veins on the petals, textures on the leaves, and subtle color variations in the flower’s center. You can also darken some of the lines to create stronger contrasts. Different Types of Flowers to Practice Drawing Once you’re comfortable with basic flower shapes, try drawing different types of flowers to diversify your skills: How to Draw Realistic Flowers To draw realistic flowers, focus on the finer details. Study real flowers closely or use reference photos to understand their intricate structure. Realism comes from paying attention to subtle curves, variations in petal size, and the play of light and shadow. Common Mistakes Beginners Make Tips for Improving Your Flower Drawing Inspiration from Famous Flower Artists Many famous artists have focused on flowers in their work. For inspiration, check out the floral paintings of: FAQs Conclusion Drawing flowers is an enjoyable and fulfilling way to improve your artistic skills. With practice, patience, and a little creativity, you can master the art of flower drawing. Remember, the key is consistency—keep sketching different types of flowers, and over time, your drawings will become more refined. Now that you have the basics, it’s time to pick up your pencil and start drawing!

How to Draw a Flower: A Step-by-Step Guide for Beginners Read More »

How Long Will It Take to Improve Your Sketching?

How Long Will It Take to Improve Your Sketching?

Sketching is a rewarding yet challenging pursuit that many people embark on with varying levels of commitment and experience. Whether you’re picking up a pencil for the first time or you’re looking to refine your existing skills, one of the most common questions is: How long will it take to improve your sketching? In this comprehensive guide, we’ll explore what factors influence your progress, practical tips for accelerating your improvement, and set realistic expectations for your artistic journey. Understanding the Basics of Sketching Improvement Before we dive into the specifics of improvement timelines, it’s essential to understand what sketching entails. Sketching is a form of drawing where the focus is on capturing the essence and structure of a subject quickly. Unlike detailed artwork, sketches are often characterized by their loose and spontaneous nature. 1. The Importance of Consistent Practice Improving your sketching skills requires regular and consistent practice. Just like learning a new language or musical instrument, the more you practice, the better you become. Consistency helps build muscle memory and enhances your ability to translate what you see onto paper. Tip: Aim for at least 30 minutes of sketching practice each day. Short, frequent sessions are more effective than occasional long sessions. 2. Setting Realistic Goals Setting realistic goals is crucial for maintaining motivation. Instead of aiming for perfection, focus on incremental improvements. Set specific, measurable goals like improving your ability to draw proportions or experimenting with different shading techniques. 3. The Role of Feedback and Critique Receiving constructive feedback from others can significantly accelerate your learning process. Engage with fellow artists, join sketching groups, or seek feedback from a mentor. Critiques help you identify areas for improvement and gain new perspectives on your work. Factors Affecting the Timeframe for Improvement The time it takes to improve your sketching skills varies based on several factors. Let’s break down some of these key elements. 4. Your Current Skill Level Your current skill level plays a significant role in how quickly you improve. Beginners may see rapid progress as they learn fundamental techniques, while more experienced artists might focus on refining their style and tackling more complex subjects. 5. The Quality of Your Practice Not all practice is created equal. Deliberate practice, which focuses on specific areas of improvement and pushes your boundaries, is more effective than mindlessly drawing. Pay attention to details, practice with intention, and work on areas where you struggle. 6. The Complexity of Your Goals The complexity of your goals impacts the timeframe for improvement. Simple goals, like mastering basic shapes or lines, can be achieved relatively quickly. More complex goals, such as developing a unique artistic style or mastering advanced techniques, may take longer. 7. Time Spent Practicing The amount of time spent practicing directly affects how quickly you see improvement. More practice generally leads to faster progress. However, quality matters more than quantity, so ensure your practice sessions are focused and productive. 8. Your Learning Resources Utilizing effective learning resources can enhance your progress. Books, online tutorials, workshops, and art classes provide valuable insights and techniques that can expedite your improvement. Choose resources that align with your learning style and goals. Typical Timeframes for Improvement Understanding typical timeframes can help set realistic expectations for your artistic journey. Here’s a general overview of what to expect: 9. Beginners: 3 to 6 Months For beginners, significant progress is often visible within 3 to 6 months of regular practice. During this period, you’ll grasp basic techniques, improve your hand-eye coordination, and develop a foundation for more advanced skills. 10. Intermediate Artists: 6 to 12 Months If you’re at an intermediate level, expect to see noticeable improvements in 6 to 12 months. During this time, you’ll refine your techniques, experiment with different styles, and tackle more complex subjects with greater confidence. 11. Advanced Artists: 1 Year and Beyond For advanced artists, improvement is a continuous journey. You may notice ongoing enhancements in your skills over 1 year and beyond as you delve into more intricate techniques, develop a unique style, and explore advanced artistic concepts. Tips to Accelerate Your Sketching Improvement To speed up your progress, consider incorporating the following strategies into your practice routine: 12. Experiment with Different Techniques Exploring various sketching techniques, such as cross-hatching, stippling, and contour drawing, can enhance your versatility and broaden your skill set. 13. Study the Work of Other Artists Analyzing the work of accomplished artists provides valuable insights into different styles and techniques. Pay attention to their use of line, shading, and composition. 14. Keep a Sketchbook Maintaining a sketchbook allows you to track your progress, experiment with new ideas, and document your artistic journey. It also serves as a source of inspiration and reflection. 15. Take Breaks and Avoid Burnout Avoid overworking yourself by taking regular breaks. Rest and relaxation are essential for maintaining creativity and preventing burnout. Improving your sketching skills is a journey that requires patience, consistency, and a willingness to learn. While the time it takes to see significant progress varies based on individual factors, setting realistic goals and engaging in deliberate practice will set you on the right path. Remember, every artist progresses at their own pace, and the key is to enjoy the process and celebrate your achievements along the way. Happy sketching! FAQs

How Long Will It Take to Improve Your Sketching? Read More »

Daily sketching practice

How Can I Be Good at Sketching? 7 Simple Steps to Master the Art

Sketching is more than just a hobby; it’s a way to express your creativity, emotions, and ideas through simple lines and shapes. Whether you’re an absolute beginner or someone who wants to take their skills to the next level, the journey to becoming proficient in sketching is enjoyable and rewarding. If you’re wondering how you can be good at sketching, don’t worry—it’s easier than you think. With practice, patience, and a few simple tips, you’ll see noticeable improvement in no time. In this article, we will explore 7 simple steps to help you master the art of sketching and bring your imagination to life on paper. 1. Start with the Basics: Master Simple Shapes Every complex drawing starts with simple shapes. If you’re new to sketching, don’t jump into drawing intricate details right away. Instead, focus on mastering basic shapes like circles, squares, triangles, and lines. By combining and adjusting these shapes, you’ll be able to sketch more complex subjects such as people, animals, and landscapes. Tip: Practice drawing these shapes in different sizes and orientations. Over time, this will improve your hand-eye coordination and give you a solid foundation for more detailed work. 2. Observe and Analyze Real-Life Objects Observation is key to improving your sketching skills. Take time to closely observe real-life objects, whether it’s the way light falls on a cup or how shadows form under a tree. Pay attention to the proportions, angles, and textures. Tip: Carry a small sketchbook with you wherever you go and try to quickly sketch what you see. This can include people sitting at a café, a plant by the window, or even your own hand. 3. Learn Proper Shading Techniques Shading can add depth and dimension to your sketches, making them more realistic and visually appealing. Start by learning how to create smooth gradients using different levels of pressure on your pencil. Tip: Use the hatching (parallel lines), cross-hatching (intersecting lines), stippling (dots), and blending techniques to shade your sketches. Experiment with different pencils, from soft to hard leads (e.g., 2B to 6B), to achieve the desired effect. 4. Practice Drawing Every Day Consistency is key when learning any new skill, and sketching is no exception. The more you practice, the better you’ll become. Set aside at least 15-30 minutes a day to sketch something. Whether it’s a doodle, a still life, or a quick portrait, the daily practice will help you sharpen your skills and build confidence. Tip: Create a sketching schedule to track your progress. Over time, you’ll notice that your lines become more confident, and your drawings start to look more polished. Looking to enhance your sketching experience? Find the best sketching pencils that suit your needs. Shop the top-rated sketching pencils here and take your artistry to the next level! 5. Experiment with Different Tools While pencils are the go-to tools for sketching, experimenting with different mediums can broaden your skills. Try using pens, charcoal, markers, or even digital sketching tablets to vary your experience. Each medium offers unique qualities and challenges that will help you grow as an artist. Tip: Start with simple, affordable tools before investing in more expensive art supplies. This allows you to explore different techniques without feeling limited by your materials. 6. Take Reference from Other Artists Studying the work of other artists can inspire and inform your sketching practice. Whether it’s classic artists like Leonardo da Vinci or modern illustrators, observe their use of lines, composition, and shading techniques. Tip: Try copying their sketches or applying their techniques to your own drawings. This doesn’t mean plagiarizing their work—instead, use their style as a reference to help you develop your own. 7. Be Patient and Don’t Fear Mistakes Sketching is all about learning through trial and error. Don’t be afraid to make mistakes—they’re a natural part of the learning process. If your sketches don’t turn out as you expected, view it as an opportunity to improve. Over time, you’ll develop your unique style and approach. Tip: Keep all of your old sketches to track your progress. You’ll be amazed at how much you can improve in just a few months of consistent practice. Becoming good at sketching doesn’t happen overnight, but with dedication, practice, and the right mindset, anyone can improve their skills. By focusing on basic shapes, observing the world around you, experimenting with different tools, and embracing your mistakes, you’ll find that sketching becomes not only easier but more enjoyable. Remember, there’s no right or wrong way to sketch. The most important thing is to have fun and express yourself. So, grab your sketchbook and start drawing today! FAQs

How Can I Be Good at Sketching? 7 Simple Steps to Master the Art Read More »

6 Essential Tips on How to Improve Your Sketching Skills

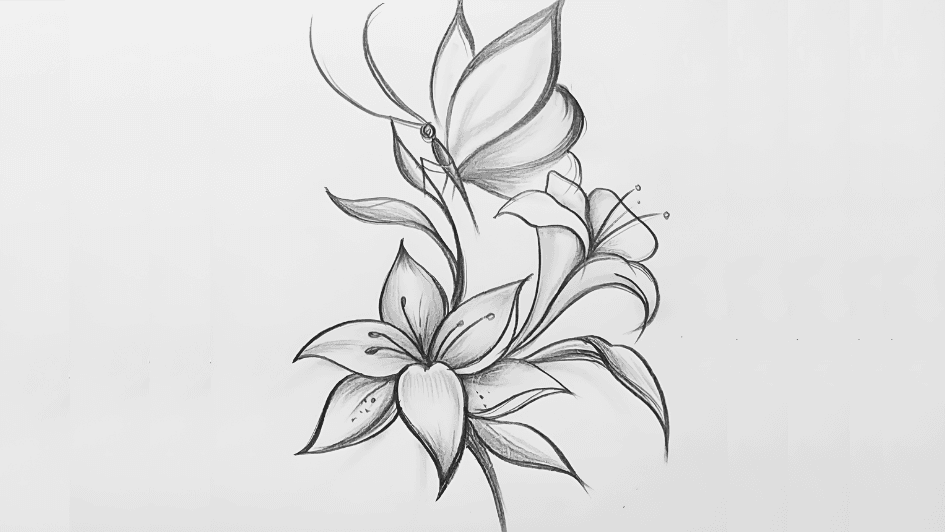
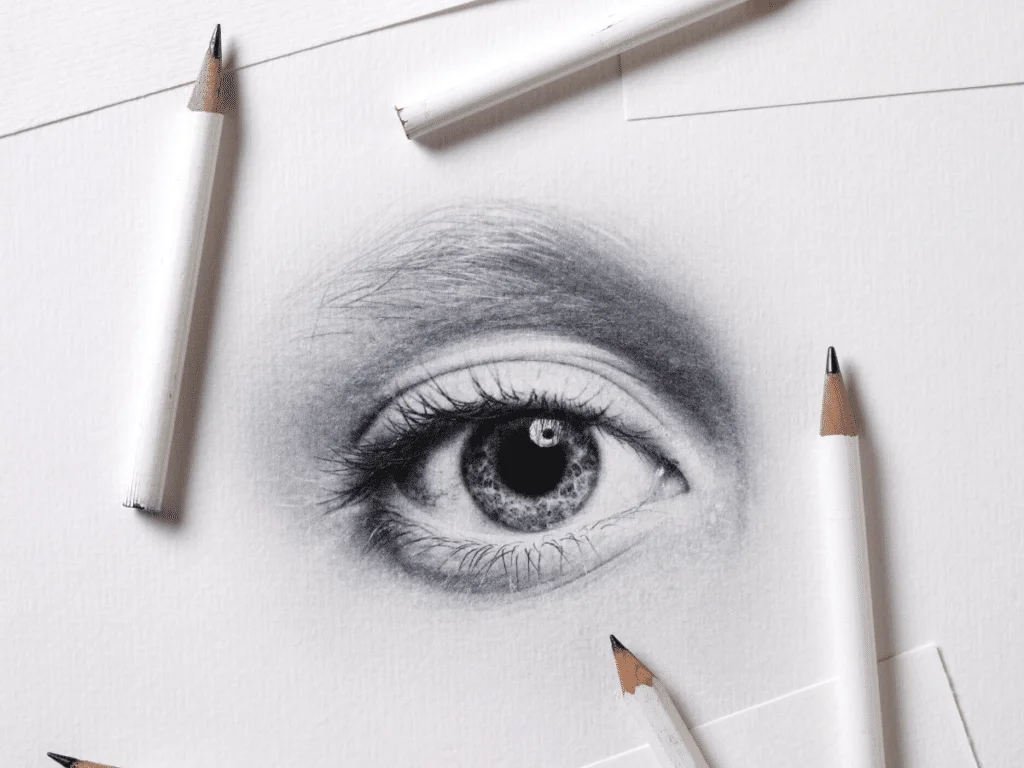
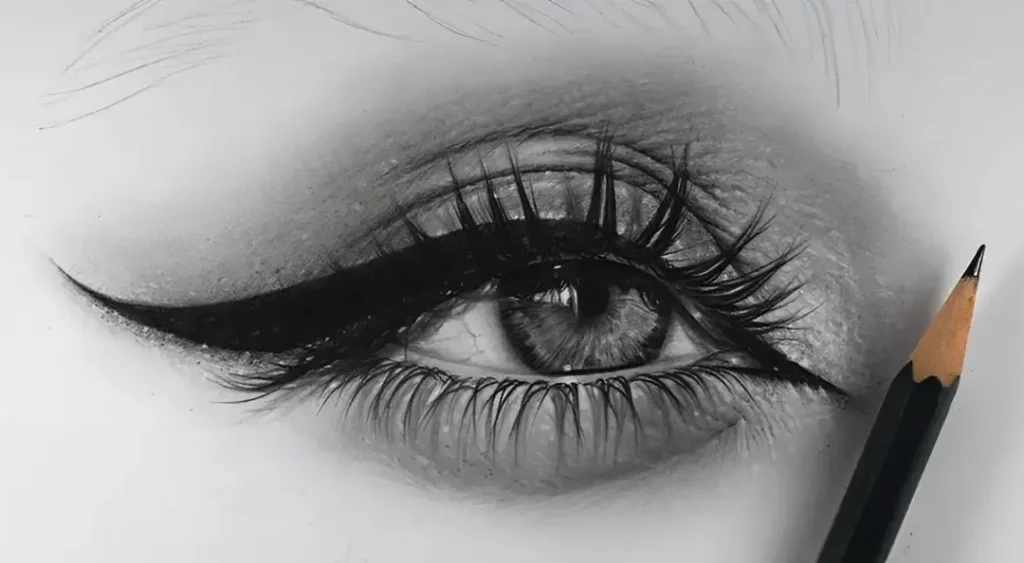
Sketching is the backbone of visual art, serving as the starting point for artists of all levels. Whether you’re just beginning your artistic journey or seeking to refine your techniques, mastering sketching is key. In this blog, we’ll explore practical tips and strategies to help you improve your sketching skills. From grasping the basics of shapes and proportions to experimenting with light, shadow, and different mediums, you’ll find actionable advice that will elevate your drawings. Whether your goal is to create more realistic sketches or to broaden your creative horizons, these insights will set you on the right path. Understanding the Basics of Sketching Before diving into advanced techniques, it’s essential to grasp the fundamentals of sketching. Start by familiarizing yourself with basic shapes—circles, squares, triangles—and how they form the building blocks of more complex subjects. Practicing these shapes helps you understand proportions and perspectives, crucial elements that define the accuracy and realism of your sketches. For example, when sketching a face, start by drawing an oval for the head, then add guidelines to mark the positions of the eyes, nose, and mouth. This step-by-step breakdown makes complex subjects manageable and improves the overall structure of your sketches. For a deeper dive into sketching basics, check out our blog post “Sketching for Beginners: A Comprehensive Guide to Basic Techniques. Improving Your Line Quality The quality of your lines can dramatically influence the outcome of your sketches. Lines can be expressive, conveying mood, texture, and form. To improve your line quality, practice drawing long, continuous lines without lifting your pencil from the paper. Focus on controlling the pressure you apply, as this will affect the thickness and darkness of your lines. Try varying your line work by incorporating different types of lines—such as smooth, broken, thick, and thin—in your sketches. This variation adds depth and interest to your drawings. As you practice, you’ll develop a more confident and fluid line, which is essential for creating polished, professional-looking sketches. Practicing with Different Mediums Experimenting with various sketching tools can significantly enhance your skills and broaden your artistic repertoire. Each medium—whether it’s graphite, charcoal, ink, or colored pencils—offers unique characteristics that can change the feel and appearance of your sketches. For instance, graphite pencils allow for precise detail and smooth shading, while charcoal creates bold, expressive lines and rich textures. By working with different mediums, you’ll learn how to adapt your techniques to suit each one’s strengths. This experimentation not only keeps your practice sessions exciting but also deepens your understanding of how to manipulate different tools to achieve your desired effect. Experimenting with Light and Shadow Shading is crucial for adding depth and realism to your sketches. Understanding how light interacts with objects will help you create more three-dimensional and lifelike drawings. Start by identifying the light source in your composition and observing how it affects the object’s highlights and shadows. Practice shading techniques such as hatching, cross-hatching, and blending to create smooth transitions between light and dark areas. Experiment with different types of lighting—natural sunlight, artificial lighting, or dramatic lighting setups—to see how shadows change in intensity and direction. This experimentation will enhance your ability to depict volume and depth in your sketches. Using References Effectively Using references is a vital tool for improving your sketching accuracy and understanding. Whether you use photographs, real-life objects, or other artworks, references can help you capture details and proportions that are difficult to achieve from imagination alone. However, it’s important to use references as a guide rather than copying them exactly. Start by analyzing your reference, breaking it down into basic shapes, and noting key details. Then, sketch your interpretation, focusing on capturing the essence of the subject while allowing room for your creative input. This approach helps you learn from your references while still developing your unique style. Regular Practice and Experimentation Consistent practice is the cornerstone of improvement in any artistic discipline. Set aside dedicated time each day or week for sketching. Focus on different subjects and techniques to keep your practice varied and engaging. For example, you might spend one session working on portraits and the next on landscapes or abstract forms. Don’t be afraid to experiment—try new styles, tools, and approaches. This experimentation not only prevents creative burnout but also leads to breakthroughs in your skills. Keep a sketchbook to track your progress over time, and don’t shy away from revisiting old sketches to see how much you’ve improved. Improving your sketching skills is a continuous journey that requires dedication, practice, and a willingness to experiment. By mastering the basics, focusing on line quality, experimenting with different mediums, and using references effectively, you’ll see noticeable progress in your work. Remember, the key is to keep sketching regularly and to enjoy the process of growth as an artist. FAQs:

6 Essential Tips on How to Improve Your Sketching Skills Read More »

10 Essential Sketching Techniques Every Beginner Should Master

Sketching is an art form that unlocks your creativity and helps you capture the world around you. Whether you’re just starting or looking to refine your skills, mastering basic techniques is crucial. In this guide, we’ll explore ten essential sketching techniques designed for beginners. From understanding pencil pressure to experimenting with textures, these techniques will lay a solid foundation for your artistic journey. Let’s dive into these fundamental methods to help you create stunning sketches and develop your unique style. 1. Understanding Pencil Pressure Mastering pencil pressure is the first step in sketching. By varying the pressure you apply to your pencil, you can create a range of line thicknesses and intensities. Light pressure yields delicate, fine lines, while heavy pressure produces darker, more defined marks. Practice adjusting your pressure to see how it affects your lines and shading. This skill is fundamental in creating depth and dimension in your sketches. 2. Mastering Line Variety Line variety is crucial for adding interest and realism to your sketches. Experiment with different types of lines, including straight, curved, thick, and thin. Each line type can convey different emotions and characteristics. For instance, jagged lines might represent rough textures, while smooth, flowing lines can indicate softness. Incorporate a mix of line types to enhance the dynamism of your drawings. 3. Practicing Shading Techniques Shading adds depth and dimension to your sketches. Start with basic shading techniques such as hatching, cross-hatching, and stippling. Hatching involves drawing parallel lines, while cross-hatching involves layering perpendicular lines. Stippling uses dots to create shading. Practice these techniques to understand how light and shadow affect objects. Mastering shading will make your sketches appear more three-dimensional. 4. Exploring Texture Creation Texture gives your sketches a lifelike quality. Experiment with creating different textures using various techniques. For example, you can create a rough texture by applying quick, jagged lines or a smooth texture by using gentle, overlapping strokes. Observe textures in real life and try to replicate them in your sketches. This practice will improve your ability to depict various surfaces and materials. 5. Using the Grid Method The grid method is a useful technique for achieving accurate proportions in your sketches. By overlaying a grid on your reference image and your sketch paper, you can transfer details more accurately. This method helps break down complex images into manageable sections, ensuring that proportions and perspectives are correct. It’s an excellent tool for beginners to develop their observational skills. 6. Developing Proportions and Perspective Understanding proportions and perspective is essential for realistic sketching. Practice drawing basic shapes and objects with correct proportions. Study how objects appear smaller as they recede into the distance and how parallel lines converge at a vanishing point. Incorporate these principles into your sketches to create a sense of depth and realism. 7. Capturing Movement and Gesture Gesture drawing focuses on capturing the essence of movement and action. It involves making quick, fluid sketches to convey the dynamic nature of a subject. Practice drawing people or animals in motion, focusing on the overall movement rather than details. Gesture drawing helps improve your ability to capture life and energy in your sketches. 8. Experimenting with Different Materials Exploring different sketching materials can enhance your creativity and skill. Experiment with various types of pencils, pens, and paper to see how they affect your sketches. For instance, charcoal can create rich, dark lines, while colored pencils add vibrant hues. Trying out different materials will help you find what works best for your style. 9. Incorporating Negative Space Negative space refers to the empty areas around and between subjects in your sketch. Paying attention to negative space can help you achieve more balanced and accurate compositions. Practice drawing the shapes of the negative space to improve your ability to see and capture proportions and relationships between objects. 10. Tips for Regular Practice Consistent practice is key to improving your sketching skills. Set aside time each day to draw, experiment with new techniques, and reflect on your progress. Keep a sketchbook to document your work and track your development. Regular practice will help you refine your techniques and build confidence in your abilities. Mastering these ten essential sketching techniques will provide a solid foundation for your artistic journey. By practicing pencil pressure, line variety, shading, and other methods, you’ll enhance your skills and develop a unique sketching style. Remember, regular practice and experimentation are crucial for growth. Keep sketching, stay inspired, and enjoy the process of creating art. FQAs:

10 Essential Sketching Techniques Every Beginner Should Master Read More »

How to Draw – A Step-by-Step Guide for Beginners

Drawing is a timeless art form that allows for personal expression and creativity. Whether you’re a complete novice or looking to refine your skills, learning how to draw can be incredibly rewarding. In this guide, we’ll cover the fundamentals of drawing, providing you with the tools and techniques needed to start your artistic journey. Let’s explore the world of drawing and unlock your creative potential! Understanding Basic Drawing Tools To begin your drawing journey, it’s essential to familiarize yourself with basic drawing tools. These tools form the foundation of your art, and choosing the right ones can significantly impact your work. Pencils Pencils come in various grades, from hard (H) to soft (B). Hard pencils (e.g., 2H) are great for light lines and detailed work, while soft pencils (e.g., 6B) produce dark, rich lines ideal for shading. For beginners, a range of pencils from H to B can provide versatility in your drawings. Paper Choosing the right paper is crucial for achieving the desired effect in your drawings. Sketchbooks are a popular choice for their convenience and variety of paper textures. For detailed work, smooth paper is preferable, whereas rough paper works well for expressive, textured drawings. Erasers Kneaded erasers are excellent for gently lifting graphite without damaging the paper. Additionally, a vinyl eraser can provide clean, precise erasures for detailed adjustments. Other Tools Blending stumps and tortillons help in smoothing out shading and creating gradients. A sharpener is essential to keep your pencils in optimal condition. Mastering Fundamental Drawing Techniques Understanding and practicing basic drawing techniques is crucial for building a solid foundation in drawing. Line Drawing Line drawing is the simplest form of drawing, involving the creation of outlines and contours. Practice drawing various types of lines, such as straight, curved, and zigzag lines, to improve your control and precision. Shading Shading adds depth and dimension to your drawings. Practice different shading techniques like hatching, cross-hatching, stippling, and blending to achieve realistic textures and gradients. Perspective Perspective is essential for creating the illusion of depth and space. Start with basic one-point perspective and gradually progress to more complex two-point and three-point perspectives. Practice drawing simple shapes like cubes and cylinders to understand how perspective affects their appearance. Developing Your Drawing Style As you become more comfortable with basic techniques, it’s important to develop your unique drawing style. Experiment with different subjects, techniques, and tools to find what resonates with you. Observation Drawing from observation is an excellent way to improve your skills. Study real-life objects, people, and landscapes, paying close attention to details, proportions, and lighting. This practice will enhance your ability to capture the essence of your subjects. Imagination Don’t limit yourself to drawing what you see. Let your imagination run wild and create original artworks from your mind. This practice encourages creativity and helps develop your distinctive artistic voice. Experimentation Try different mediums, such as charcoal, ink, or digital drawing tools. Experimenting with various techniques and materials can lead to new discoveries and unique styles. Tips for Continuous Improvement Becoming proficient in drawing takes time and dedication. Here are some tips to keep you motivated and continually improve your skills. Practice Regularly Consistency is key to improvement. Set aside dedicated time each day or week for drawing practice. Even short, regular sessions can lead to significant progress over time. Seek Feedback Share your work with others and seek constructive feedback. Joining art communities, both online and offline, can provide valuable insights and encouragement from fellow artists. Study Other Artists Analyze the work of artists you admire. Study their techniques, compositions, and use of color. Learning from others can inspire and inform your own artistic development. Keep a Sketchbook Maintaining a sketchbook is an excellent way to document your progress and explore new ideas. Use it as a creative journal where you can freely experiment without the pressure of producing a finished piece. Embrace Mistakes Mistakes are part of the learning process. Embrace them as opportunities to learn and grow. Don’t be afraid to take risks and try new things, even if they don’t turn out perfectly. Drawing is a skill that anyone can learn with practice and patience. By understanding basic tools, mastering fundamental techniques, developing your style, and continuously seeking improvement, you can unlock your artistic potential. Remember, every great artist started as a beginner. Keep drawing, stay inspired, and enjoy the creative journey! FAQS By following these guidelines, you can create a comprehensive and engaging blog post on “how to draw” that is both informative and SEO-friendly.

How to Draw – A Step-by-Step Guide for Beginners Read More »

Shopping Cart