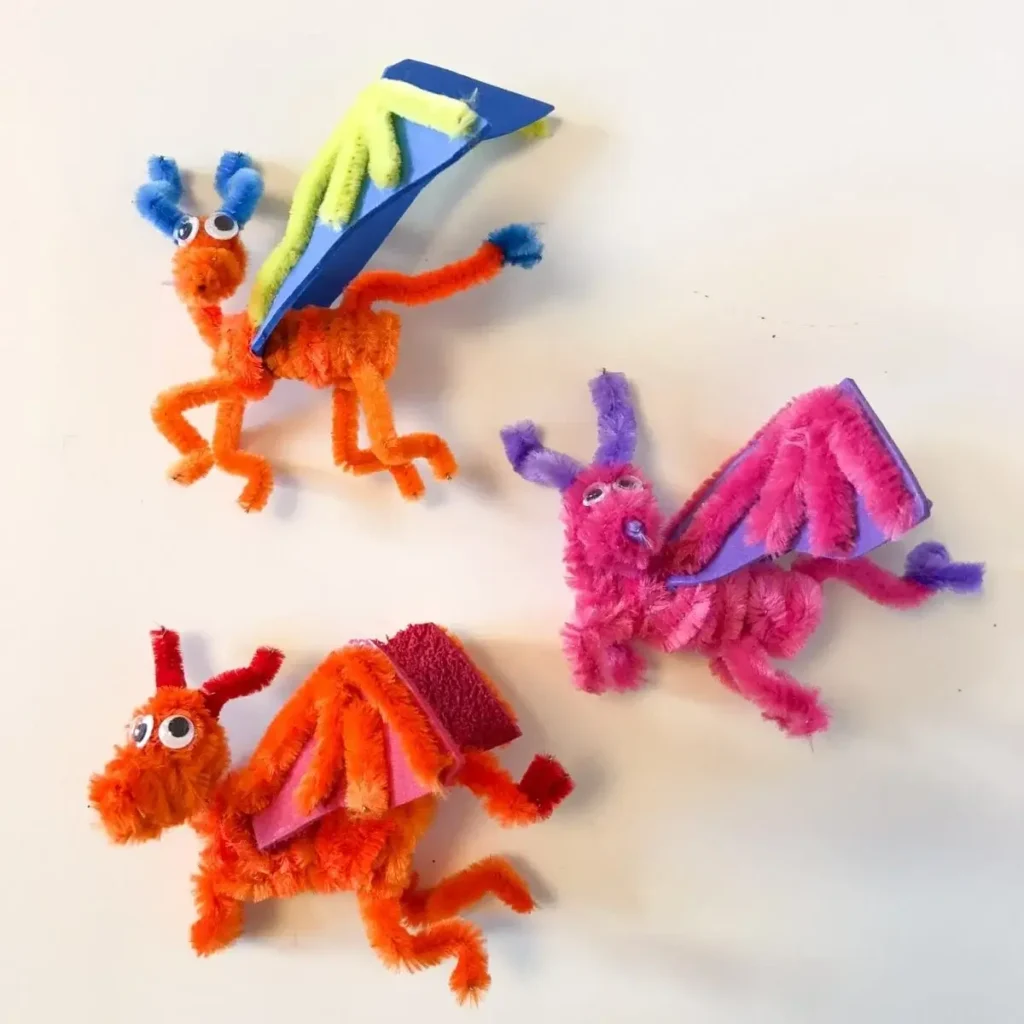
Creating a pipe cleaner dragon is an exciting and creative craft project for both kids and adults! Pipe cleaners are colorful, versatile, and fun to work with. Whether you’re crafting for a school project, decorating, or just unleashing your artistic side, this guide will help you make an adorable pipe cleaner dragon step-by-step.
Let’s dive in and create a unique dragon that reflects your creativity and style.
What You’ll Need
Before starting, gather the following materials:

- 4 Green Pipe Cleaners (or your preferred color)
- 1 Yellow Pipe Cleaner (or a contrasting color)
- 2 Googly Eyes
- Colored Foam Sheet or Stiff Card
- Bostik White Glu (or any strong craft glue)
- Scissors
Step-by-Step Instructions
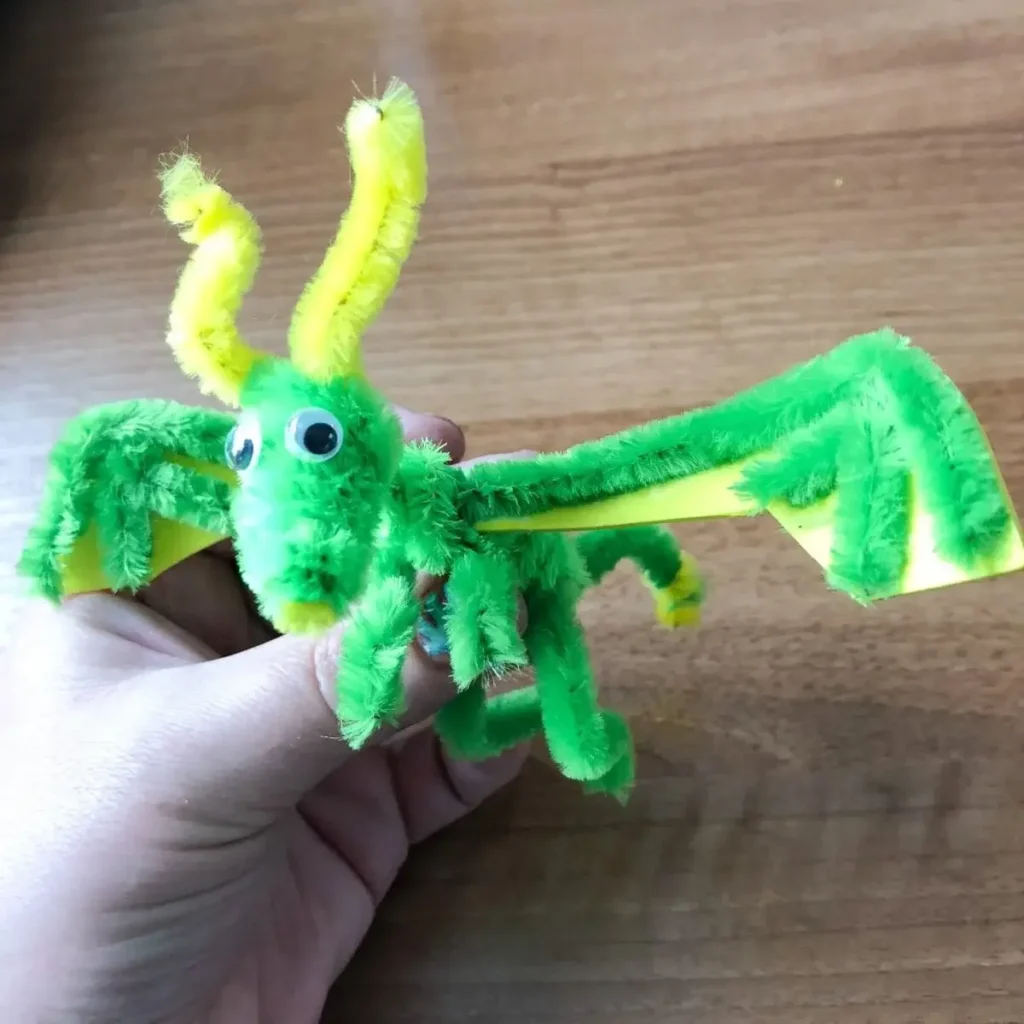
1. Making the Dragon’s Head
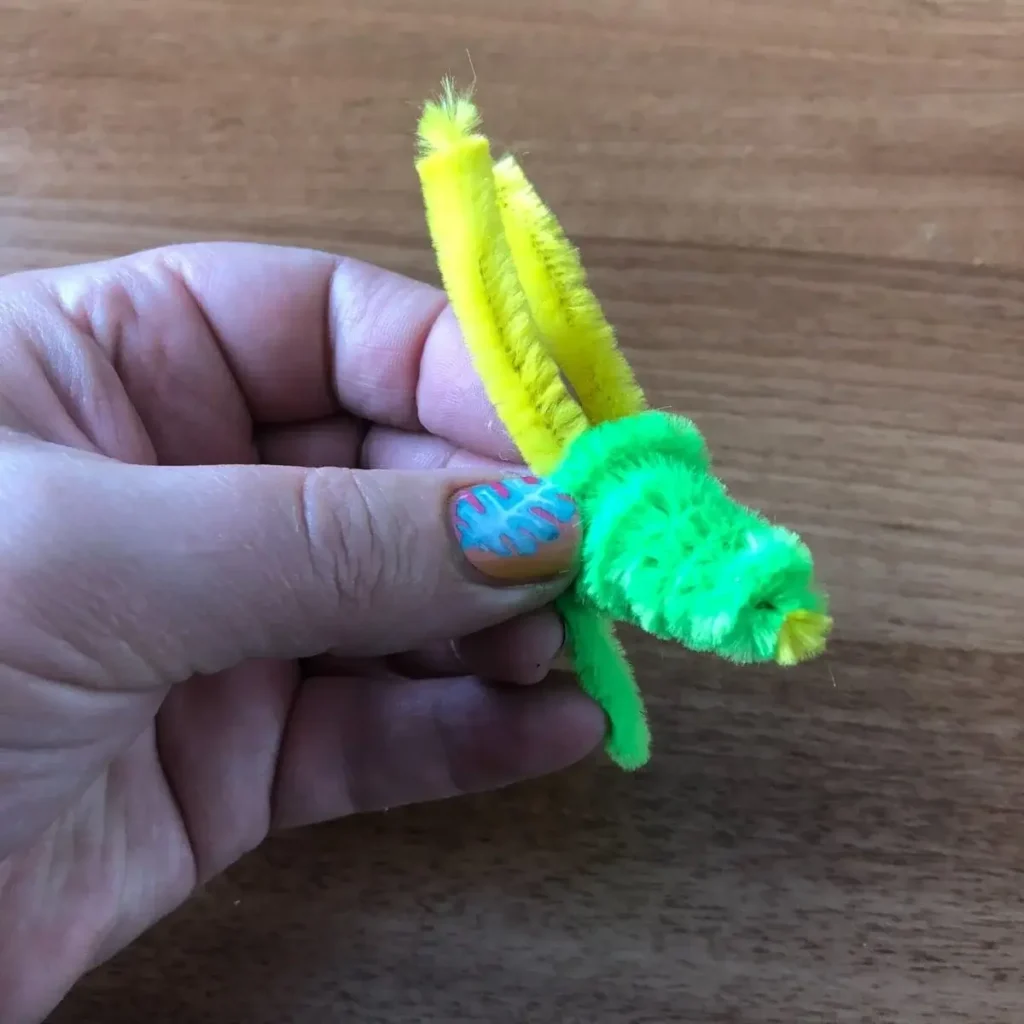
- Cut and Fold: Cut the yellow pipe cleaner in half. Take one piece and fold it in half again.
- Create the Nose and Horns: Using a pen as a guide, wrap a green pipe cleaner around the folded yellow one. Leave a small portion of the yellow pipe cleaner sticking out at the folded end to form the dragon’s nose. Shape the remaining yellow ends into horns.
2. Building the Dragon’s Body

- Attach the Body Pipe Cleaner: Take a second green pipe cleaner and insert one end into the back of the dragon’s head. Twist it securely to keep it in place.
- Wind the Body: Wrap the green pipe cleaner around a pen to create a spiral shape, forming the dragon’s body.
3. Crafting the Legs
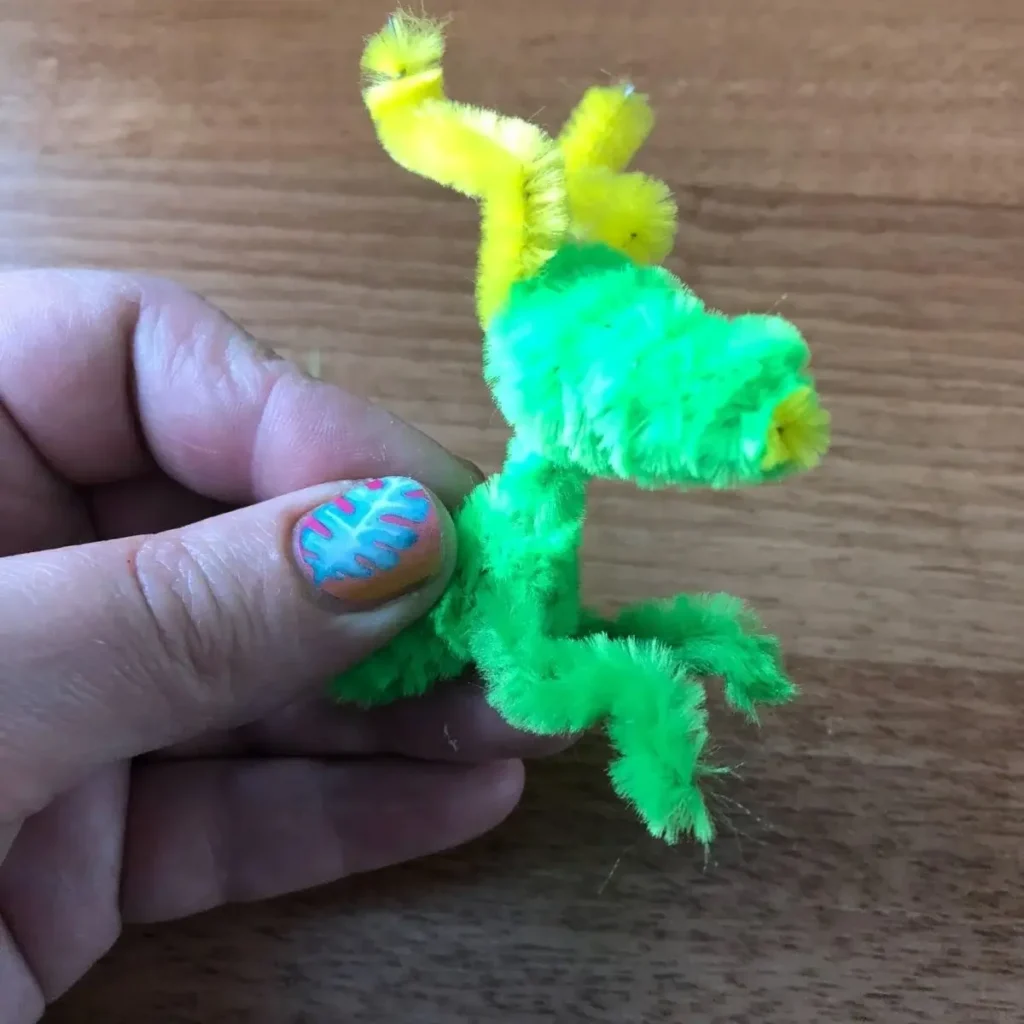
- Cut and Shape: Cut the third green pipe cleaner in half, then take one half and cut it in half again.
- Use one small piece to create the front legs and the half piece for the back legs.
- Attach the Legs: Fold each piece in half and insert them into the coils of the body. Shape the legs as needed to make your dragon stand.
4. Adding the Tail
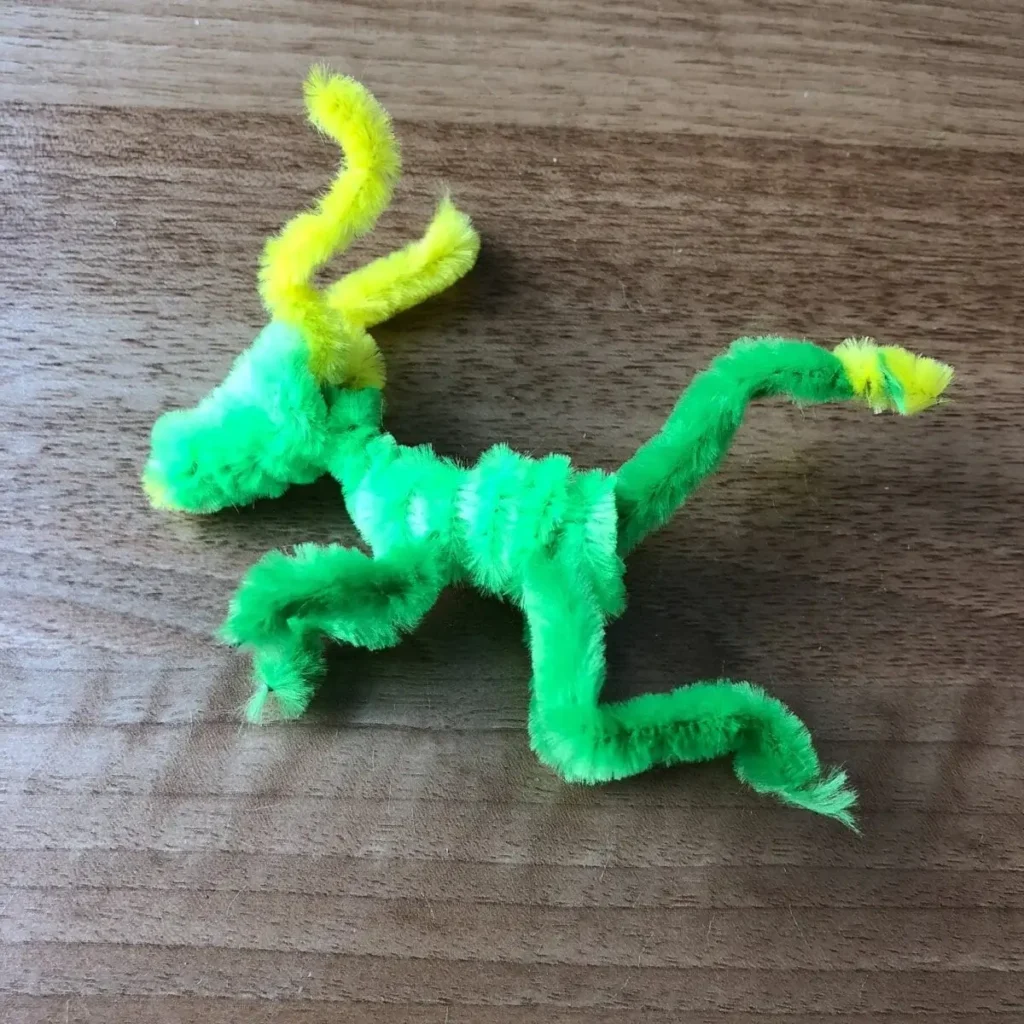
Wrap and Secure: Wrap a small piece of yellow pipe cleaner around the end of the last quarter piece of green pipe cleaner.
Attach the Tail: Insert the other end into the back of the dragon’s body. Apply some Bostik White Glu to ensure it stays secure.
5. Creating the Wings

Shape the Wings: Fold the last green pipe cleaner into the desired wing shape. Trim off any excess sections if necessary.
Attach the Wings: Glue the wings to a foam sheet or stiff card. Once the glue is dry, cut out the wings and attach them to the dragon’s body. Insert the wing ends between the coils of the body, securing them with glue.
6. Final Touches
Add the Eyes: Use the Bostik White Glu to stick the googly eyes onto the head.
Adjust and Pose: Carefully adjust the wings, legs, and tail to give your dragon its final shape.
Customization Ideas
The beauty of crafting with pipe cleaners is the endless customization possibilities. Try these ideas to make your dragon truly unique:
- Use different colors to match your theme or favorite palette.
- Add sparkly pipe cleaners for a magical look.
- Create patterns or textures by combining multiple colors in the body and tail.
- Add extras like scales or spikes using small cutouts of foam or felt.
Why Pipe Cleaner Dragons Are Perfect for Crafting
Pipe cleaner dragons are fun, creative, and simple to make. They’re perfect for:
- Kids’ Craft Projects: Engaging and easy for little hands.
- Party Decorations: Great as whimsical table accents.
- DIY Toys: Dragons are sturdy yet flexible, perfect for play.
Conclusion
Crafting a pipe cleaner dragon is a rewarding and imaginative activity. It may take a few tries to perfect, but the process is as enjoyable as the final product. Get creative, experiment with colors, and have fun bringing your dragon to life!